 Pin it
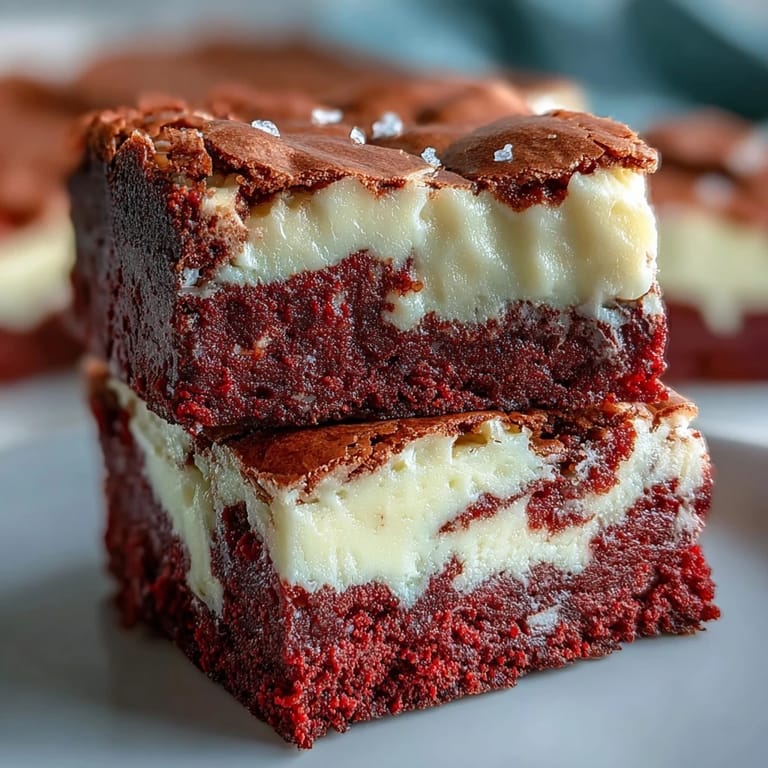
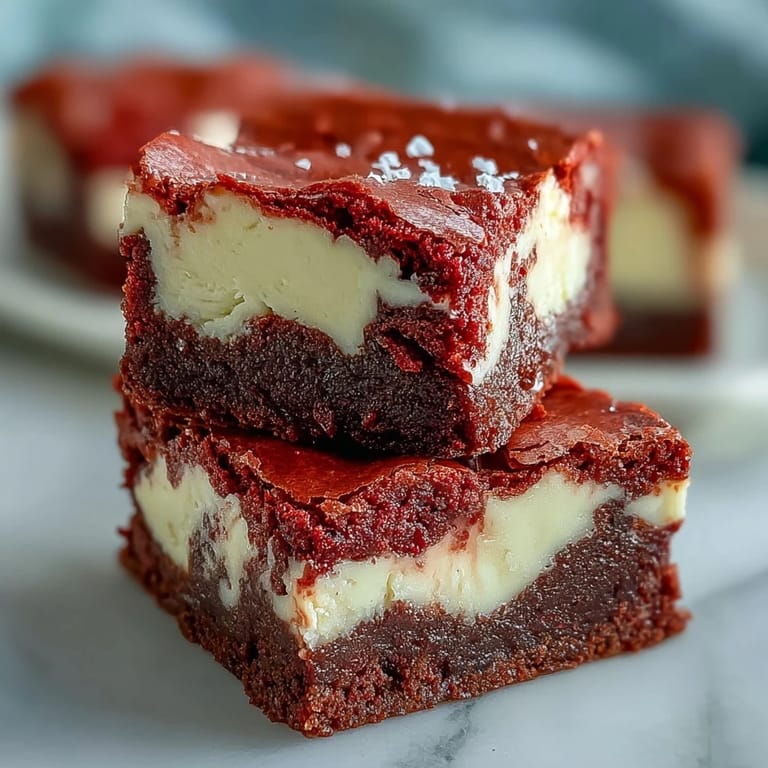
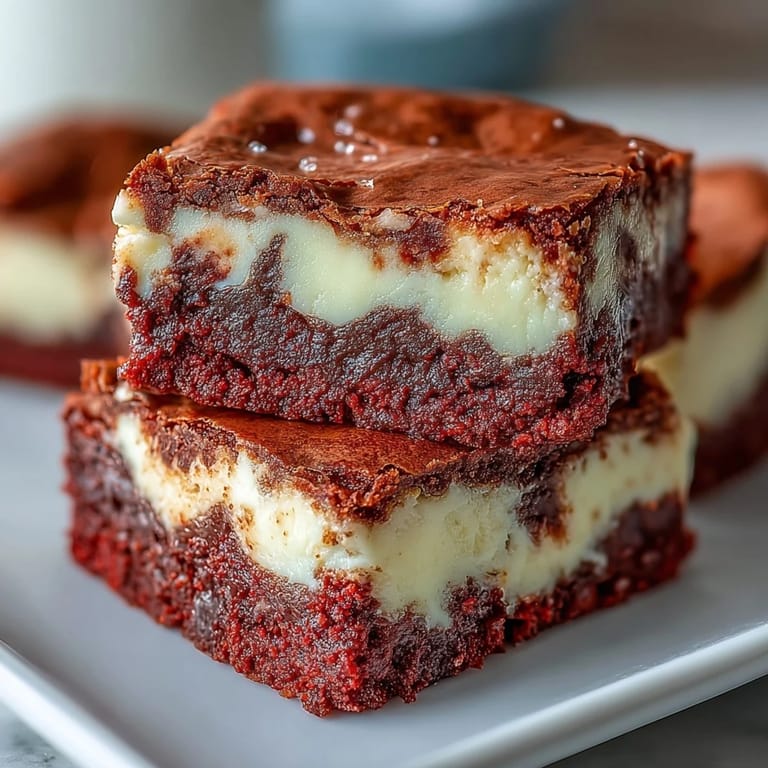
 The first time I brought these to a potluck, my friend Sarah actually hid two in her purse before anyone else could get seconds. That velvety crimson against the snowy white swirl creates something almost too pretty to eat—until you take that first fudgy, creamy bite and all restraint vanishes.
I learned the hard way that room temperature ingredients are non-negotiable here. Once I rushed through and ended up with tiny specks of cream cheese that never quite blended into the swirl—still delicious, but not the marble magic I was aiming for. Patience is what separates good from breathtaking.
Ingredients
- 115 g (1/2 cup) unsalted butter, melted: Melt it gently and let it cool slightly so it doesnt scramble your eggs when you whisk them in
- 200 g (1 cup) granulated sugar: This creates that crackly, paper-thin crust on top that serious brownie lovers dream about
- 2 large eggs, at room temperature: Cold eggs can cause the cheesecake layer to seize up and turn grainy
- 1 tsp vanilla extract: Use the good stuff here since vanilla plays a supporting role in both layers
- 1 tbsp red food coloring: Gel coloring gives you that deep ruby red without adding extra liquid, but liquid works in a pinch
- 1/4 tsp salt: Essential for balancing all that sugar and letting the cocoa shine through
- 60 g (1/2 cup) all-purpose flour: Too much flour and you lose the fudgy texture, so measure with a light hand
- 20 g (2 tbsp) unsweetened cocoa powder: Sift it to avoid any stubborn lumps in your silky batter
- 225 g (8 oz) cream cheese, softened: Leave it out for at least an hour so it blends into velvet instead of fighting back
- 50 g (1/4 cup) granulated sugar: Just enough to sweeten the tangy cream cheese without overwhelming it
- 1 large egg, at room temperature: This single egg is what gives the cheesecake layer its luxurious, custard-like set
- 1/2 tsp vanilla extract: A double dose of vanilla ties both layers together into one cohesive experience
Tired of Takeout? 🥡
Get 10 meals you can make faster than delivery arrives. Seriously.
One email. No spam. Unsubscribe anytime.
Instructions
- Get your oven and pan ready:
- Preheat to 175°C (350°F) and line a 20x20 cm (8x8-inch) pan with parchment paper, letting the edges hang over like little handles for easy lifting later
- Whisk the wet brownie ingredients:
- In a large bowl, whisk melted butter and sugar until they become glossy and smooth, then beat in eggs, vanilla, and food coloring until everything looks uniformly crimson
- Fold in the dry ingredients:
- Sift flour, cocoa, and salt directly into the wet mixture, then fold with a spatula just until no dry streaks remain—overmixing makes brownies tough instead of tender
- Spread and reserve:
- Set aside 1/4 cup of batter in a small cup, then spread the rest evenly in your prepared pan, using the back of a spoon to smooth it into the corners
- Make the cheesecake layer:
- Beat softened cream cheese in a medium bowl until its perfectly smooth, then add sugar, egg, and vanilla, mixing until creamy and free of any lumps
- Layer it up:
- Pour the cheesecake mixture over the red velvet batter and spread it gently so the two layers stay distinct but intimate
- Create the swirl:
- Dollop your reserved red velvet batter across the cheesecake layer, then drag a knife through in figure-eights or spirals—do not overthink it, the marble effect is forgiving and beautiful
- Bake to just set:
- Bake for 35 minutes until the center barely jiggles and a toothpick comes out with moist crumbs, not wet batter
- The hardest part—waiting:
- Cool completely on a wire rack, then refrigerate for at least 2 hours so the layers firm up enough to cut into clean, gorgeous squares
 Pin it
 My niece asked if I could make these for her birthday instead of a regular cake, and honestly, I understood completely. Theres something about slicing through those marbled layers that feels like unwrapping a present every single time.
The Art of the Perfect Swirl
I spent way too much time researching marble techniques before realizing that overthinking is actually the enemy here. A quick, confident knife movement creates those gorgeous ribbon patterns, while hesitant dragging just muddies the design. The key is lifting your knife slightly as you swirl instead of pressing it into the batter—think of it as skimming the surface rather than stirring soup.
Room Temperature Matters More Than You Think
Cream cheese that's even slightly chilled will leave tiny white specks throughout your swirl instead of blending seamlessly. I set my ingredients out about two hours before I start baking, arranging them on the counter like a little row of ducks in a row. The extra waiting time pays off when you slice into those perfectly smooth, professional-looking layers.
Make-Ahead Magic
These actually improve after a night in the refrigerator, which makes them my go-to for entertaining. I bake them the day before, wrap the pan tightly in plastic, and wake up to dessert that's ready to serve. The flavors meld together, the texture becomes even more decadent, and you get to enjoy your own party instead of frantically frosting something at the last minute.
- Use a hot knife to get those pristine clean cuts—wipe it clean between each slice
- Press a piece of plastic wrap directly onto the cut surface if storing for more than a day
- These freeze beautifully for up to three months if you can manage not to eat them all first
 Pin it
 Some desserts are worth the extra effort, and these red velvet cheesecake brownies prove it every single time. Hope your friends are as greedy about hiding seconds as mine are.
Recipe FAQs
- → How do I ensure my cheesecake layer is smooth?
To achieve a perfectly smooth cheesecake layer, ensure your cream cheese is thoroughly softened to room temperature before beating. This helps prevent lumps and allows it to incorporate smoothly with the other ingredients.
- → Can I make these brownies ahead of time?
Absolutely! These brownies are excellent for making in advance. Once cooled completely, refrigerate them for at least 2 hours before cutting, or even overnight. They can be stored in an airtight container in the refrigerator for up to 5 days, maintaining their delicious texture.
- → What's the best way to swirl the layers?
After spreading the cheesecake mixture, dollop small amounts of the reserved red velvet batter over it. Then, use a knife or skewer to gently drag through the dollops, creating elegant marble patterns. Avoid over-swirling to keep the distinct layers visible.
- → Why did my brownies come out dry?
Overbaking is a common cause for dry brownies. Keep a close eye on them during the last few minutes of baking. They are done when the center is just set, and a toothpick inserted comes out with moist crumbs, not wet batter. The residual heat will continue to cook them slightly as they cool.
- → Can I omit the red food coloring?
While the red food coloring gives these brownies their signature vibrant hue, you can certainly omit it. The flavor profile will remain the same, though they will appear as fudgy chocolate cheesecake brownies rather than classic red velvet.
- → How do I cut clean squares?
For neat squares, ensure the brownies are completely chilled in the refrigerator for at least 2 hours, or preferably longer. Use a sharp, warm knife (run it under hot water and wipe dry between cuts) for the cleanest slices. Wipe the blade after each cut.